4. Development environment (C++): Windows + Visual Studio
This chapter explains how to develop by connecting to a remote Linux server in a Microsoft Windows environment.
4.1. iFunEngine for Visual Studio
iFunFactory has an extension called iFunEngine for Visual Studio in the Visual Studio Gallery. The extension can easily configure the iFun Engine development environment in the Visual Studio IDE.
Note
iFunEngine for Visual Studio supports Visual Studio v15.
4.1.1. Installing iFunEngine for Visual Studio
Download and install the Visual C++ for Linux Development extension.
Download and install the iFunEngine for Visual Studio extension.
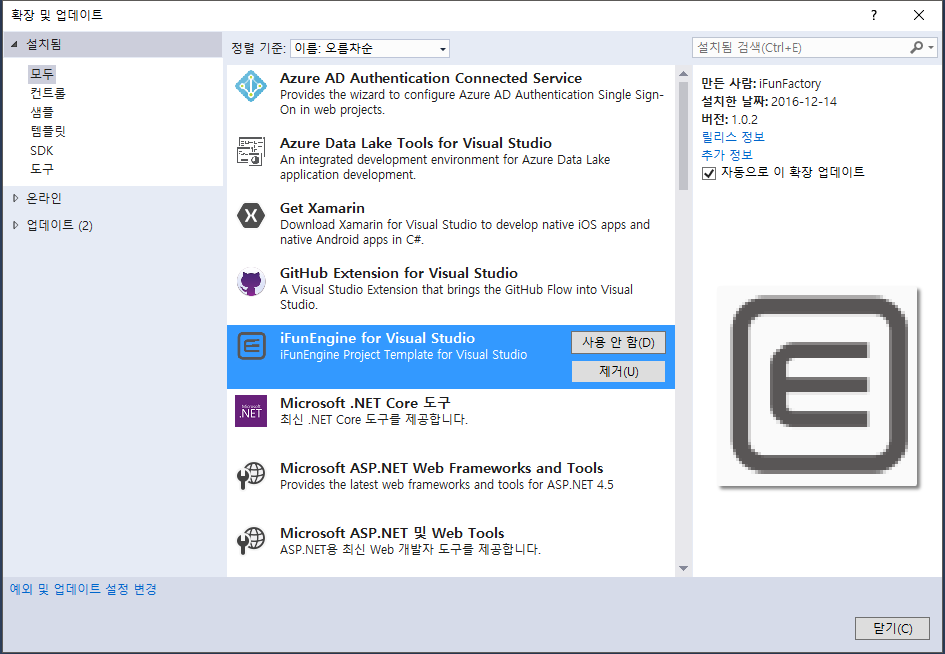
You can see the extension installed in Visual Studio in Tools > Extensions and Updates.
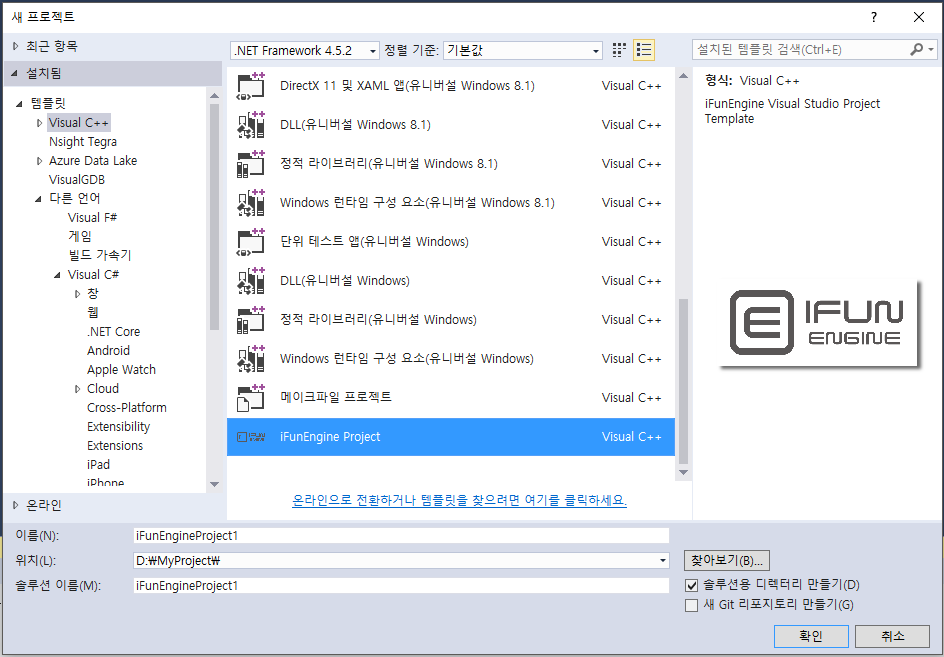
Installation is completed if you see iFunEngine Project in File > New > Project > Visual C++.
4.2. Starting a new project
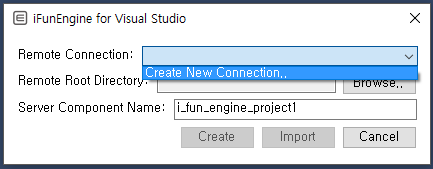
When you create a new iFun Engine project, the following window appears:
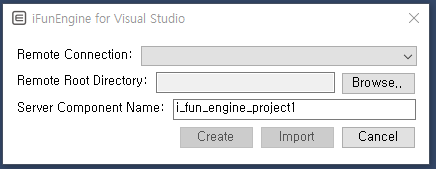
Choose Create New Connection in Remote Connection.
You will see the following screen. Enter the connection details for the remote Linux server you want to use.
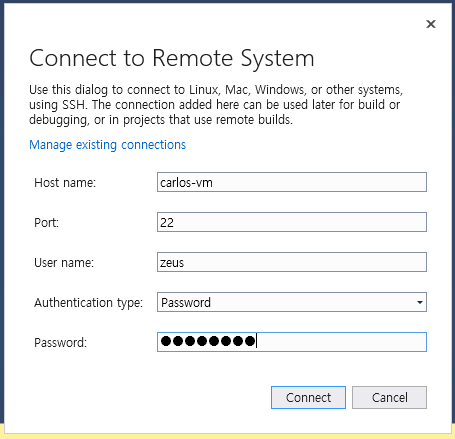
When you click on the Connect button, the server connection is tested and you will see the following screen:
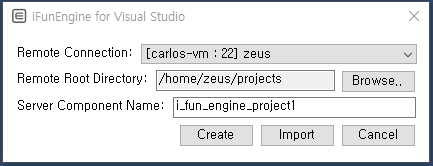
Click on the Create button to automatically create a project on the Linux server and configure the project.
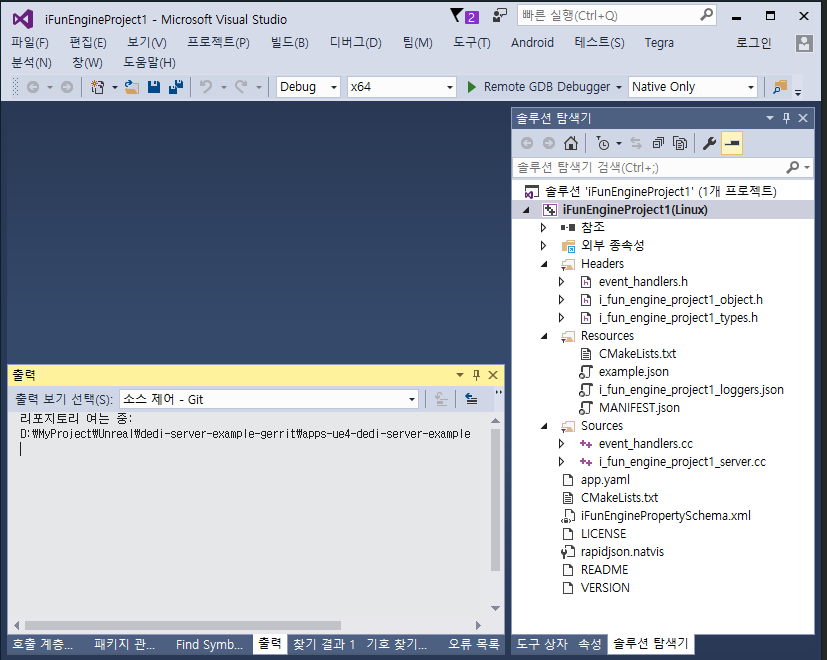
The project is now ready for development. You can now edit the source code, build, or debug.
4.3. Importing an existing project
Steps are the same as the first 4 steps (up to server connection) in Starting a new project above.
Click on the Import button on the screen above, and existing iFun Engine projects in that location will automatically be analyzed and configured.
Important
You must enter the precise names of the remote root directory (the project’s root directory) and the server component name pertaining to the project name. Do not change the auto-generated naming structure in the form of project_name-source/build.
4.4. Building a project
You can use Visual Studio’s Build menu to build the project.
4.5. Debugging a project
You can use Visual Studio’s Debug menu to debug a project. You can also use the Breakpoint feature.
4.6. Configuring IntelliSense
This section will explain how to take better advantage of Visual Studio’s autocomplete feature.
To use IntelliSense in a Visual Studio environment, you need to add the referring header file to the IntelliSense cache.
iFunEngine for Visual Studio adds the following menus to Visual Studio:
In
Tools>Download iFunEngine headers, you can download iFun Engine’s general header files to add to the IntelliSense cache.In
Tools>Download boost headers, you can download the boost library header files to add to the IntelliSense cache.
Note
The boost library header files are about 80-100 MB. They may take some time to download depending on your network connection.
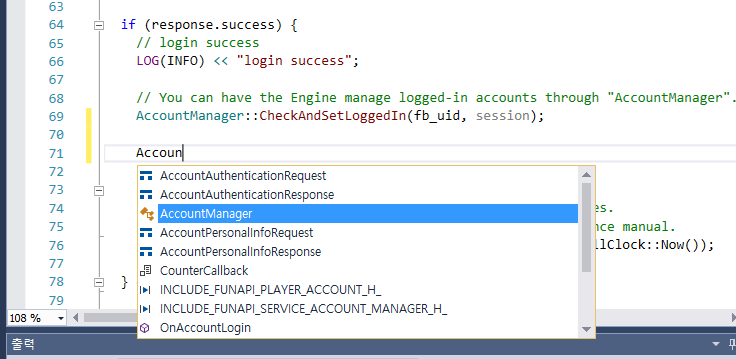
After downloading all header files, you can check that autocomplete is working as follows:
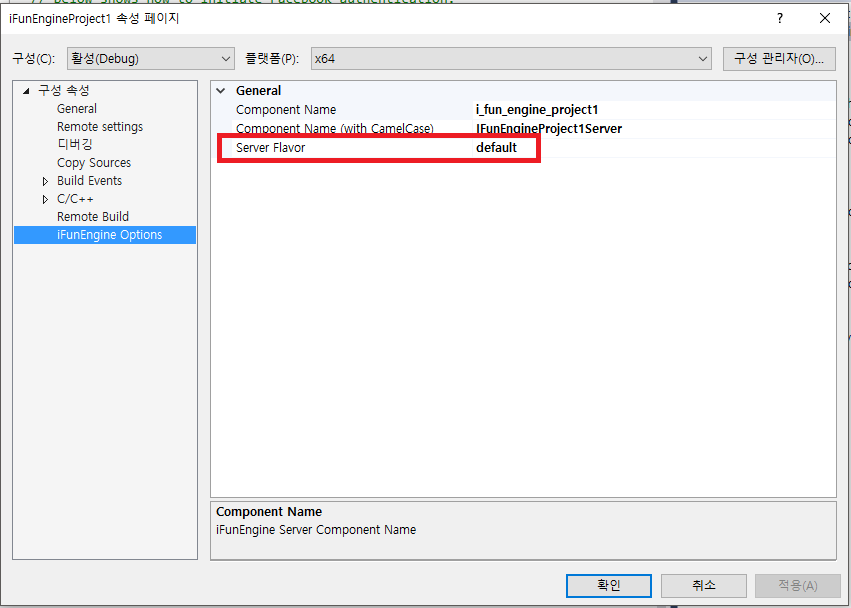
4.7. Switching a Flavor
For general information on the flavor feature, please refer to Flavors: Identifying servers according to their role.
To switch a flavor in the Visual Studio IDE, you need to do following steps.
You can see a tab named iFunEngine Options when you go to Project > Properties pages.
Type in a desired flavor name in the tab.